Table of Contents
ToggleTub-to-shower conversions have become one of the smartest investments for small bathrooms. When floor space is precious, replacing a bulky bathtub with a streamlined shower opens up the room, improves traffic flow, and often increases home value. Whether the goal is accessibility, modernization, or simply reclaiming a few square feet, a conversion can transform a cramped bathroom into a functional retreat. This guide walks through the planning, design options, and installation essentials to help homeowners make an well-informed choice and execute the project successfully.
Key Takeaways
- A tub-to-shower conversion reclaims 12–15% of bathroom square footage while reducing water usage from 35–50 gallons per bath to 2.5 gallons per minute, making it ideal for small bathrooms seeking both space and efficiency.
- Walk-in and corner shower designs maximize functionality in tight spaces; corner units fit in as little as 12–13 square feet while offering superior usability compared to standard bathtubs.
- Proper floor slope (minimum 1/8-inch drop per foot) and waterproofing with cement board and moisture-resistant membranes are critical to prevent water damage and mold in shower conversions.
- Verify plumbing accessibility and drain location before planning your conversion; rerouting pipes can significantly increase costs, requiring permits and professional plumber involvement in many jurisdictions.
- Project costs range from $1,500–$3,000 for basic acrylic-surround conversions to $3,000–$6,000+ for tile and glass upgrades, with labor typically taking 1–2 days for straightforward installations.
Why Small Bathrooms Benefit From Shower Conversions
A bathtub occupies 5 by 2.5 feet (or larger) and consumes roughly 12–15 percent of a typical bathroom’s square footage. Removing it immediately creates visual and practical space. Small bathrooms feel cramped when doors collide with fixtures or when a single person must squeeze past someone standing at the sink.
Showers also introduce flexibility in layout and design. A walk-in or corner shower adapts to tight spaces far better than a tub-and-surround combo, and the elimination of the tub rim and apron opens sightlines. Beyond aesthetics, shower-only bathrooms appeal to aging-in-place considerations: low-threshold or curbless showers reduce tripping hazards and work well for folks with mobility concerns.
From a resale angle, modern buyers favor showers in secondary or guest baths. A sleek, updated shower adds perceived luxury without the maintenance burden of keeping a tub pristine. Conversions also lower water usage, a typical shower uses 2.5 gallons per minute (EPA standard), whereas a bath uses 35–50 gallons. Homeowners can explore more home renovation ideas to see how conversions fit into a broader modernization strategy.
Plan Your Space: Layout and Measurements
Before ordering materials or hiring a contractor, measure the existing tub surround and evaluate the plumbing. Most standard bathtubs are 60 inches long, 30–32 inches wide, and 14–16 inches deep. The space they occupy isn’t always ideal for a shower, you need at least 36 inches of clear floor space for entry and movement. Check ceiling height: standard is 8 feet, but older homes sometimes have 7.5-foot ceilings, which still work but feel tighter with showerheads.
Sketch the bathroom layout on graph paper. Note where the drain is located, moving it is costly and may require permit approval depending on your jurisdiction. Mark doorways, windows, and any radiators or other fixtures. A corner or diagonal shower layout often maximizes small spaces better than a straight recessed unit.
Consider the finish materials too. Ceramic tile, porcelain, acrylic, and neo-angle or frameless glass enclosures all have different footprints and cost profiles. The layout directly determines how much tile or surround panel you’ll need, so precise measurements prevent costly overages or shortages.
Assessing Your Plumbing Setup
The drain connection is the linchpin of any conversion. Modern drains typically sit 2–4 inches below the floor. If your tub drain is centered in the current surround, you can often use it as-is. If it’s offset or you plan a curbless design, you may need to reroute the P-trap, which requires opening walls and possibly calling in a licensed plumber.
Inspect the supply lines too. Hot and cold water lines should be accessible at the wall behind the tub. If they’re run under the floor (common in older homes), rerouting becomes more invasive. Check for shutoff valves and test water pressure using a simple pressure gauge (under $10). Low pressure, below 40 psi, can mean sediment buildup or a failing pressure regulator: address this before installing fixtures.
Most municipalities require permits for plumbing changes. Check your local building department’s requirements: some jurisdictions allow homeowner permits for cosmetic conversions, while others insist on licensed work. It’s honest to admit upfront if this step requires professional help, a plumber’s site visit costs $75–$150 but saves thousands in rework if something’s wrong.
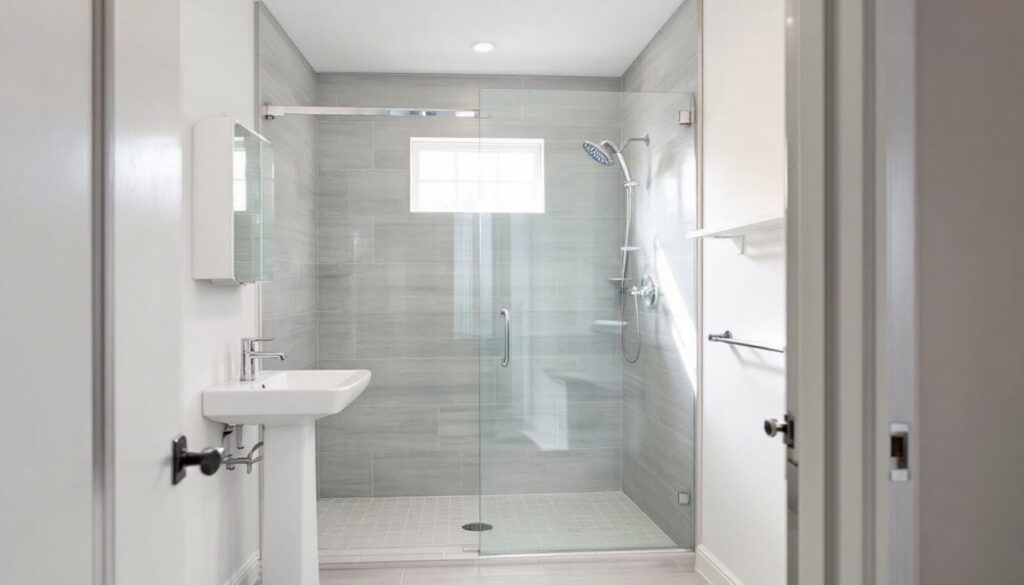
Walk-In Showers for Maximum Functionality
A walk-in shower, essentially an open entry with no tub surround lip, maximizes usable floor space and offers the most accessible option. They work especially well in small bathrooms because the open design makes the room feel larger. The trade-off is that splash and drainage need careful planning.
For a true walk-in, the floor slopes gently toward the drain at a minimum 1/8-inch drop per foot of distance. This isn’t a steep slope, barely noticeable underfoot, but it’s essential to prevent standing water. Many DIYers hire a plumber or tile specialist to set the slope, as getting it wrong leads to puddling and mold.
Frameless glass enclosures are popular for walk-ins: they let light and sight-lines flow through, keeping a small bathroom from feeling closed off. A half-glass surround (roughly 3–4 feet high) provides splash control without the visual weight of a full enclosure. Glass frameless panels cost $500–$1,500 installed, depending on size and thickness: framed or track-based units run $300–$800.
Alternatively, porcelain or ceramic tile surrounds cost less upfront but demand meticulous grout maintenance. Epoxy grout resists moisture better than standard cement grout and costs about 30 percent more. Bathroom conversion examples from renovation specialists show how tile color and pattern can define the space while keeping costs down. A basic tile walk-in surround runs $400–$1,000 in materials, not including labor.
Corner Showers and Compact Designs
When floor space truly is at a premium, a corner or neo-angle shower slots into the existing alcove where the tub was, minimizing layout disruption. A 36-by-36-inch corner unit fits many small bathrooms and requires only 12–13 square feet of footprint, comparable to the old tub but with far better usability.
Neo-angle (three-sided corner) designs use 30–36-inch widths and work well in rooms where angles are unavoidable. A 32-by-32-inch neo-angle occupies less floor area than a standard 36-by-60-inch bathtub while providing a comfortable shower. These enclosures often pair with acrylic or fiberglass surrounds, which cost $150–$400 for the unit alone. Installation labor is typically 1–2 days if no plumbing rerouting is needed.
Fiberglass and acrylic surrounds (one-piece or panel sets) are faster and cheaper to install than tile. They lack the longevity of quality tile, 10–15 years versus 25+ years for tile, but they eliminate grout maintenance. A one-piece acrylic corner surround with integrated shelves and grab bars runs $300–$600. For homeowners focused on quick turnaround or budget, this is a practical middle ground.
A walk-in corner design is also possible: the drain sits at the inside corner, and open-face entry from one side keeps the footprint tight. This approach requires precise slope-work on the floor but delivers an open, modern feel in as little as 4 square feet of floor space. This design often appeals to aging-in-place renovations: entry-level corner walk-in showers, with proper slope and grab bars, can be completed for $1,200–$2,000 in materials and labor in most markets.
Essential Materials and Installation Considerations
Before buying materials, verify building codes in your jurisdiction. The International Residential Code (IRC) requires shower enclosures to prevent splash escape: whirlpool-bath standards also apply if the shower will have jet features. Water shutoff valves must be accessible, and drain pitch is non-negotiable, code enforcement inspections catch slope violations quickly.
Core materials include a new shower valve (pressure-balancing or thermostatic, ~$150–$300), showerhead, trim kit, surround (tile, panels, or glass), and waterproofing underlayment. If you’re removing the existing tub, also budget for disposal, many haulers charge $75–$150 to remove a cast-iron tub.
Waterproofing is critical. A shower surround sits inches from drywall: any moisture penetration rots framing fast. Use cement board (not drywall) as the substrate, and apply a liquid waterproofing membrane or tile backer board with waterproof tape at seams. Tile-specific waterproofing membranes cost $20–$40 per gallon and require two coats: expect 1–2 gallons for a small bathroom surround.
If installing tile, budget 4–6 hours for an experienced DIYer or 1–2 days for a professional. Tiling mistakes are forgiving early (within the first 24 hours) but permanent once grouted. Pre-slope the floor (or use a pre-slope former) before laying tile: it eliminates the most common walk-in shower problem: water pooling at the drain.
PPE and tools matter too. Wear dust masks when cutting cement board, eye protection when grouting, and gloves when handling acrylic surrounds (they stain easily). A wet saw with a diamond blade cuts tile cleanly: a standard utility blade works but creates chips. Grout float, spacers, and a caulk gun round out the basics, total tool investment for a one-time project runs $50–$150.
For plumbing connections, use PEX tubing or copper supply lines per code: rough-in valves must be soldered or crimped before walls close. If you’re comfortable with basic plumbing, this is doable: if not, hire a licensed plumber for the rough-in ($150–$300 per hour, typically 2–4 hours for a simple conversion). Mistakes here mean opening walls later.
A simple acrylic-surround conversion in a straightforward space runs $1,500–$3,000 in materials and labor. Tile and glass upgrades push costs to $3,000–$6,000+. Research home improvement advice and expert tips from established sources to understand what factors most affect your regional pricing and timeline.
Conclusion
A tub-to-shower conversion pays dividends in function, safety, and perceived space. The key is honest upfront planning: measure, assess plumbing, and pull permits if required. Choose a layout that fits your bathroom’s footprint, walk-in for openness, corner for compactness, and invest in waterproofing to protect the framing long-term. Whether you tackle the project yourself or hire professionals, understanding the essentials helps ensure a durable, attractive result that homeowners will enjoy for years.