Table of Contents
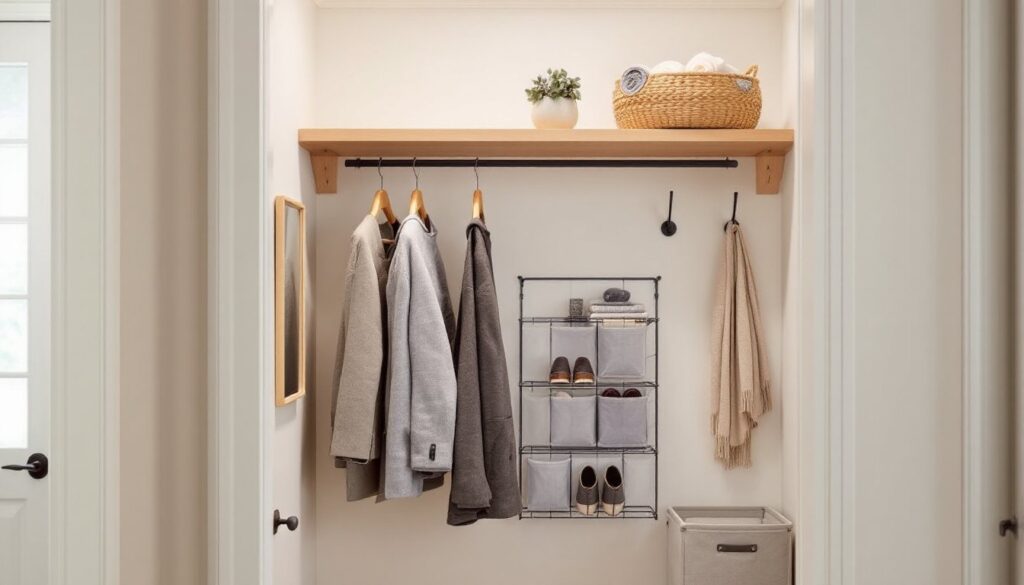
ToggleA tiny coat closet by the front door shouldn’t be a source of frustration. Whether you’re dealing with coats piled on the floor, shoes scattered around, or shelves that can barely hold anything, a cramped entryway closet wastes valuable real estate and creates the impression of chaos the moment guests arrive. The good news: you don’t need much space or a big budget to turn it into an organized, attractive storage zone. With some smart planning, strategic shelving, the right organizational systems, and thoughtful finishing touches, you can maximize every inch and create a closet that actually works, and looks good doing it.
Key Takeaways
- Measure your small entryway coat closet space carefully, noting door clearance and stud locations, before purchasing any organizational systems to avoid costly mistakes.
- Install double-hang rods, wall-mounted hooks rated for 25+ pounds, and floating shelves to maximize vertical storage and reclaim closet capacity without expanding floor space.
- Use hanging shoe organizers, labeled bins, and matching hangers to create a functional and visually cohesive small entryway coat closet that contains items and reduces visual clutter.
- Add proper lighting (at least 300 lumens) and paint interior walls light neutral colors or use mirrors to make your closet feel larger and more inviting.
- Declutter items you haven’t used in a year and add finishing touches like peel-and-stick wallpaper or odor control sachets to transform a cramped closet into an organized, attractive storage zone.
- Invest in affordable organizational solutions like rolling carts (under $30), Command hooks ($5–15), and fabric bins ($15–35) to keep your entryway closet functional on any budget.
Assess Your Current Space and Constraints
Before buying anything, spend 10 minutes measuring and observing your closet. Note the width, depth, height, and any architectural quirks, a sloped ceiling, an offset door frame, or an air return vent will affect your layout. Check for existing studs behind drywall using a stud finder: you’ll need them to anchor shelving and heavy-duty rods securely.
Look at your lifestyle. Are you storing mostly jackets and a few pairs of shoes, or do you have kids’ gear, umbrellas, and miscellaneous items too? This determines how much shelf space you truly need versus hook space. Also consider traffic: an entryway closet sees constant daily use, so durability and easy reach matter more than aesthetics alone.
Measure door clearance carefully. An inward-swinging door limits what you can store on the inside wall nearest the door hinge. If the door opens fully, you have more room for shelving. Take a photo and make a rough sketch, it takes two minutes and prevents expensive ordering mistakes.
Maximize Vertical Storage With Shelving and Hooks
Install Wall-Mounted Solutions
The fastest way to reclaim closet capacity is to use vertical space. Remove the door, hang it on the back of the door, or leave it in place, it depends on your access needs and the closet’s layout.
Install a double hang rod if you have coats and jackets of varying lengths. Standard closet rod height is 66 inches from the floor for single hang and approximately 84 inches for upper hang in double-rod systems. You can purchase ready-made double-hang kits with brackets at any home improvement store: they cost $30–60 and save enormous space versus a single rod. Use heavy-duty shelf brackets rated for at least 50 pounds per pair, closets get heavy fast when stacked with winter gear.
Locate studs (typically 16 inches on center) and fasten brackets with 3-inch wood screws or lag bolts, not just drywall anchors. If you can’t hit studs, use rated heavy-duty anchors and don’t overload the shelf. Test with weight before filling.
Hooks are your secret weapon. Install a rail of sturdy hooks (commercial-grade is worth it) along the side walls or above the door frame. A single Command hook holds 5 pounds, but metal hooks on studs hold 25+ pounds. Space them 3–4 inches apart so you can hang multiple items per hook without tangling.
Add Floating Shelves for Accessories
Floating shelves create visual interest and provide spot storage for hats, scarves, and shoes without legs taking up floor space. They require careful installation: use a level to mark the location, find studs, and screw in mounting brackets (not into drywall alone). A 24-inch floating shelf costs $25–80 depending on material.
Keep shelves at eye level and above for items you don’t reach daily (seasonal hats, guest shoes), and use accessible lower shelves for everyday rotation. Shoe cubbies or slim wire shelves work well here and can be added or removed as needs change.
Choose the Right Organizational Systems
A shelf holding a pile of jackets isn’t organized, it’s just a shelf. Invest in bins, hanging organizers, and dividers that contain items visually and functionally.
Hanging shoe organizers (the over-the-door kind or fabric wall-mounted versions) take up almost no floor space and keep shoes visible and accessible. Clear pockets let you see contents at a glance. A quality organizer runs $15–35 and instantly adds 10–15 pairs of storage.
Wire baskets or fabric bins sit on shelves and keep loose items grouped, gloves, scarves, and hats in one basket, umbrella stands in another. Label them so everyone knows what belongs where. Canvas bins feel more refined than plastic and hide clutter while staying lightweight.
Hooks with labeling work well for coats you wear weekly. Assign each family member a hook so coats don’t end up in a heap. Use a label maker (inexpensive and worth every penny) rather than hand-written labels, it looks intentional and lasts longer.
Consider a slim rolling cart if you have 18+ inches of floor space. It slides in, holds shoes, scarves, and seasonal items, and rolls out when you need to access the back. At under $30, it’s one of the cheapest expandable storage options.
Real Simple’s organization tips cover decluttering principles that apply directly to entryway closets, the rule of thumb is that if you haven’t worn or used something in a year, it shouldn’t occupy prime real estate. This mindset alone frees up shelf space and makes your closet feel less cramped.
Improve Lighting and Visual Space
A dark closet feels smaller and makes finding items frustrating. If your closet lacks a light fixture, install one. A simple battery-operated puck light ($10–20) takes two minutes and needs no wiring. For a permanent solution, hire a licensed electrician to add a recessed light fixture or a small ceiling-mounted LED (permits usually aren’t required for this). Aim for at least 300 lumens in a small closet so you can see clearly.
Mirror the back wall or inside of the door if space permits. Even a small 12-by-24-inch mirror (adhesive-backed, $15–30) reflects light and makes the closet feel deeper. It’s also practical, you can check your outfit before leaving.
Paint the interior a light, neutral color if walls are dark. White, light gray, or soft cream make the space feel airier. A gallon of quality interior latex covers approximately 350 square feet, so you’ll use only a quart or two. Use a primer first if covering dark paint or stains. Skip the sheen debate, semi-gloss or satin paint is more durable and wipeable in a high-traffic closet than flat.
Apartment Therapy’s approach to small space design emphasizes that visual openness comes from light, color, and clean lines. In a closet, that means good lighting, minimal visual clutter (bins hide mess), and avoiding deep colors or overstuffing.
Stylish Decor and Finishing Touches
Once the bones are right, shelving in place, lighting working, items organized, small touches elevate the closet from purely functional to genuinely attractive.
A adhesive wallpaper or peel-and-stick contact paper (in a subtle pattern or solid color) costs $10–20 and transforms a plain wall without paint prep. It’s also removable if you rent or want to change it later.
Choose matching hangers (plastic, wood, or velvet) for coats on display. It’s a small detail, but uniform hangers make any closet look more intentional and less chaotic. A set of 20 hangers costs $15–30.
Add a decorative basket or bin on a high shelf with rolled seasonal scarves, belts, or hats. This “styled shelf” approach lets you embrace small-space aesthetics while keeping things tidy. Roll items instead of folding them for better visibility and space efficiency.
If your closet has a door, consider replacing it with a barn door (adds character), bi-fold louver doors (maximizes accessibility), or even a tension rod with a linen curtain (budget-friendly and softer look than solid doors). A barn door hardware kit costs $50–150: a curtain rod and fabric, under $30.
Budget-friendly makeovers from Addicted 2 Decorating often feature small closets and entryways, showing how paint, hardware swaps, and organized styling make dramatic differences. The key is consistency: stick to 2–3 colors throughout your closet, use lighting strategically, and contain everything so the eye doesn’t land on clutter.
Final touch: a slim odor control sachet or cedar block in the corner keeps the closet smelling fresh without overwhelming the entryway. It’s a detail guests won’t consciously notice, but they’ll appreciate a clean-smelling entry.