Table of Contents
ToggleDeck lattice isn’t just decorative trim, it’s a functional upgrade that screens wind, filters harsh sunlight, and adds visual interest to an otherwise flat expanse. Whether you’re hiding unsightly views, creating a shaded retreat, or simply elevating your deck’s curb appeal, lattice offers flexibility that few other additions can match. Homeowners often underestimate how much impact a well-planned lattice installation can have on both the aesthetics and usability of an outdoor space. The beauty of deck lattice is that it works for modern minimalist designs, cozy rustic settings, and everything in between. Best of all, most lattice projects are within reach for DIY enthusiasts with basic carpentry skills, though some configurations do benefit from a second pair of hands during assembly.
Key Takeaways
- Deck lattice improves both aesthetics and functionality by providing privacy, filtering sunlight, and reducing wind while maintaining air circulation and visual appeal.
- Modern deck lattice designs favor clean lines like wide-spaced diagonal patterns or horizontal-only slats painted in matte black, while classic rustic styles use thicker cedar slats and diamond crisscross patterns.
- Layer privacy strategies by combining lattice panels with climbing vines or solid boards to create true seclusion, and use full-height skirting lattice on elevated decks to block views while maintaining airflow.
- Maximize shade coverage by installing east-west pergola beams with lattice infill or using deciduous vines that naturally adjust seasonal coverage without permanent overhead structure.
- Pre-paint or stain lattice before installation, use stainless steel fasteners spaced every 12 to 16 inches, and add horizontal bracing every 24 to 36 inches for tall screens to withstand wind loads.
- Most deck lattice projects are achievable for DIY enthusiasts with basic carpentry skills, though larger installations benefit from structural planning and professional guidance for safety and durability.
What Is Deck Lattice and Why Add It?
Deck lattice refers to a crisscross framework of thin strips of wood, vinyl, or composite material arranged in geometric patterns. Unlike solid screens or walls, lattice allows air and light to pass through while breaking up sightlines, a balance that makes it ideal for outdoor spaces. Most lattice is made from pressure-treated lumber, cedar, or composite materials: the choice depends on budget, maintenance tolerance, and climate.
Why add it? Privacy is the obvious answer, but it’s rarely the whole story. Lattice creates partial shade without the harsh shadows of a roof, making afternoons more comfortable. It also serves as a visual anchor, drawing the eye upward and making a deck feel more intentional. For folks dealing with wind tunnels between buildings, strategic lattice placement can redirect gusts. And if your deck sits above ground, a skirted lattice base hides the unsightly support structure underneath while allowing air circulation to prevent moisture damage.
Modern Lattice Designs for Contemporary Decks
Contemporary deck designs often favor clean lines, so avoid ornate patterns. Consider wide-spaced diagonal lattice, which reads as sophisticated rather than fussy. Square-grid lattice (also called standard or open lattice) works well on modern decks, especially when painted matte black or charcoal instead of the traditional white.
Horizontal-only or vertical-only slats are trending for minimalist aesthetics. Rather than the classic diamond weave, horizontal boards create a striped effect that feels intentional and uncluttered. Pair this with composite materials like azek or timbertech for a maintenance-free, weather-resistant option.
Angled chevron patterns or asymmetrical layouts inject personality without clashing with modern homes. Some builders mix lattice with metal, steel frames or aluminum accents, to bridge contemporary architecture with traditional outdoor comfort. Keep the sight lines open: dense lattice can feel cramped on smaller decks. When spacing slats, aim for 1 to 3 inches between strips, depending on your privacy needs and the visual weight you want.
Classic and Rustic Lattice Styles
Classic diamond lattice, the crisscross pattern most people visualize, never goes out of style, especially on traditional or cottage-style homes. This pattern works because it’s visually balanced and forgiving during installation: minor misalignments don’t stand out like they do with rigid grids.
For rustic decks, thicker slats (typically 1-by-2 or 1-by-3 lumber) create a heavier, more architectural presence than thin strips. Rough-sawn cedar gives that lived-in character: the natural grain and weathered gray patina are part of the appeal. Unlike pressure-treated pine, cedar resists rot naturally and smells fantastic, a bonus many homeowners mention months into a project.
Staggered or irregular patterns also work beautifully in rustic settings. Imagine overlapping horizontal pieces of varying widths, creating a woven appearance. This requires more planning and precise cuts, but detailed woodworking plans are available online if you want to tackle it. Stain options for rustic lattice range from warm honey tones to dark walnut: avoid stark white unless your home’s trim is already that color.
Privacy and Shade Solutions With Lattice
Creating Strategic Privacy Screens
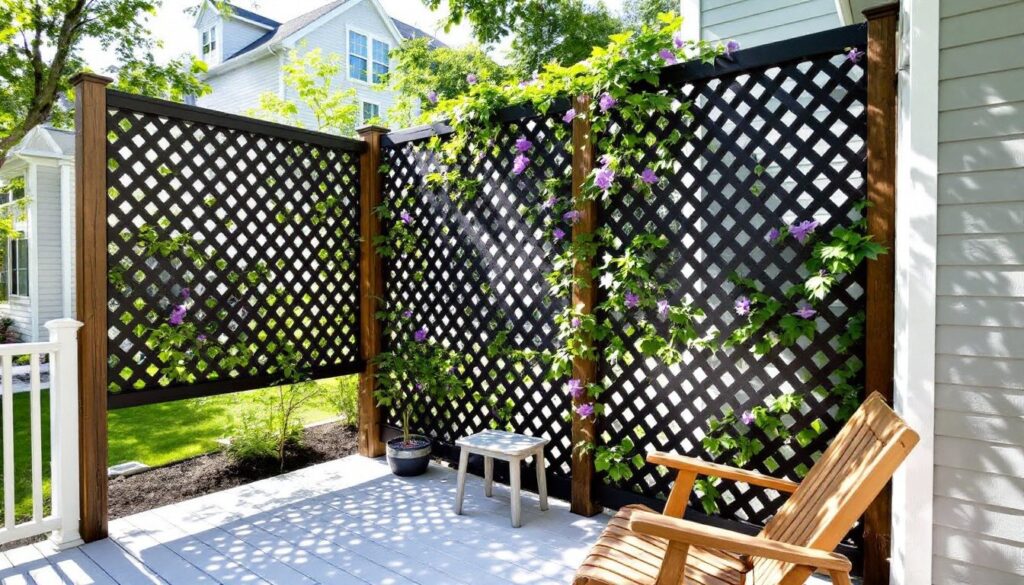
Lattice alone provides dappled privacy, neighbors can’t see clearly through it, but they know something’s there. If you need true seclusion, layer strategies. Install lattice panels on the deck’s perimeter, then add climbing vines like clematis or honeysuckle. Within a season or two, the vegetation fills gaps and creates a living screen.
Alternatively, use solid panels alongside lattice: place opaque boards every 3 to 4 feet, separated by lattice sections. This breaks up sightlines vertically and horizontally. Solid panels also support heavier planter boxes or even a lightweight living wall. Mount panels to posts or a sturdy frame to handle wind loads, lattice alone isn’t structural enough for tall screens in exposed locations.
For under-deck privacy, full-height lattice skirting (extending from ground to the deck underside) blocks views while maintaining airflow. This is especially useful on elevated decks in close-quarters neighborhoods.
Maximizing Shade Coverage
Full deck shade requires overhead structure plus lateral lattice. A pergola framework with lattice infill creates dappled shade that shifts throughout the day, enough to drop temperatures 5 to 10 degrees without blocking air movement entirely. Install the pergola’s cross-beams running east-west: afternoon sun won’t penetrate as effectively.
Dense lattice (1-inch spacing or less) provides more shade but traps heat underneath. Wider spacing (2 to 3 inches) allows better air circulation, preventing the sauna effect on humid days. If shade is critical, consider retractable shade cloth threaded through lattice panels, a hybrid approach that lets you adjust coverage seasonally.
Plant deciduous vines on south-facing lattice: they leaf out in summer and drop foliage by fall, letting winter sun warm the deck naturally. This passive strategy reduces cooling needs without permanent overhead structure.
Lattice Installation Tips for DIY Success
Measure twice, cut once, and when measuring a deck, work in full feet to minimize rounding errors that compound across longer runs. Pre-paint or stain your lattice before installation: it’s far easier to brush panels lying flat than to contort yourself reaching tight spaces afterward. If using pressure-treated lumber, let it acclimate for two weeks before cutting: the wood shrinks as it dries, and premature cuts can create gaps.
Secure lattice to sturdy posts or a rim joist using stainless steel fasteners (screws or bolts). Standard deck screws work in a pinch, but stainless resists corrosion far better, especially in coastal areas. Space fasteners every 12 to 16 inches. If building a tall privacy screen (over 4 feet), add horizontal bracing between vertical posts every 24 to 36 inches to handle wind loads, most DIYers skip this and regret it after the first storm.
For under-deck lattice skirting, install a pressure-treated frame between deck posts, then attach lattice panels to this frame with screws rather than nails. Nails work loose over time as the deck flexes. Leave a 1-inch gap at the bottom for drainage and pest access (rats shouldn’t nest behind your deck).
Safety first: wear safety glasses and work gloves when handling lumber, and a dust mask when cutting pressure-treated wood, the preservatives aren’t toxic in the wood itself, but dust inhalation is unnecessary. Use a miter saw or circular saw for angled cuts: hand-sawing lattice slats wastes energy. If your project requires structural modifications to the deck (adding posts, reinforcing joists), consult the building code or bring in a structural engineer, deck collapses aren’t theoretical.
Detailed step-by-step guidance is available through DIY woodworking tutorials and maker guides, which break down assembly processes clearly. For even more specific plans tailored to pergolas and outdoor lattice structures, woodworking resources offer tested project designs that handle layout and material lists upfront.