Table of Contents
ToggleA cramped pantry, or worse, no pantry at all, is a real problem in today’s smaller homes. If you’re squeezing canned goods into cabinet corners and stacking boxes on top of the fridge, you’re not alone. But space constraints don’t mean you’re stuck with chaos. With some smart organization strategies and a bit of DIY ingenuity, even the tiniest kitchen pantry can become a functional storage powerhouse. This guide walks you through seven practical, achievable solutions to maximize your storage without breaking the budget or your back.
Key Takeaways
- Vertical wall-mounted shelving maximizes small kitchen pantry storage by utilizing unused wall space, with shelves ideally spaced 12–14 inches apart and anchored securely into wall studs for safety.
- Over-the-door organizers and lazy Susan carousels eliminate wasted pantry space by transforming doors and corner dead zones into accessible storage for frequently-used items.
- Clear, uniform containers with waterproof labels keep small kitchen pantry items visible, prevent staleness, and save time by enabling quick identification and organized category grouping.
- Rolling utility carts and pull-out sliding drawers bring flexibility to cramped pantries, allowing you to maximize accessibility without requiring extensive renovations or expensive built-in systems.
- Organizing by category (baking, snacks, canned goods) and keeping heavier items on lower shelves improves both safety and ergonomics while preventing double-buying and food waste.
Vertical Shelving and Wall-Mounted Storage
The golden rule of small spaces: go up, not out. Vertical shelving transforms wasted wall space into usable real estate, and unlike deep pantry shelves that force items to get lost in the back, shallow wall-mounted units keep everything visible and accessible.
Start by measuring your pantry walls carefully. Standard wall studs sit 16 inches on center (check with a stud finder if unsure), which means your shelving brackets should anchor into studs for security. For food storage, aim for shelves spaced 12 to 14 inches apart, enough for most cereal boxes, cans, and jars without excessive empty space above items.
You have several options. Heavy-duty floating shelves (1.5 inches thick, rated for 25+ pounds per foot) look cleaner and give a finished aesthetic: they’re great if you’re willing to spend $50–150 per shelf depending on material and length. Budget-friendly alternative: industrial-style shelf brackets with basic plywood or pine boards. Plywood is cheaper and acceptably sturdy when properly supported, though it shows its edges unless you paint or veneer them. Always use appropriate fasteners, at minimum, lag bolts or heavy-duty anchors into studs: never rely on drywall alone.
Place heavier items (canned goods, bulk staples) on lower shelves: lighter, less-frequently-used items up high. This arrangement is safer and more ergonomic, you won’t strain reaching for a 5-pound can of tomatoes every time you cook.
Door and Corner Organization Systems
Your pantry door and the awkward corner gaps are prime real estate most homeowners waste. These zones are ideal for items you grab often but don’t need to see at a glance.
Over-The-Door Organizers
Over-the-door organizers come in many styles: clear plastic shoe holders, wire racks, or custom-built shelving. The advantage is zero footprint inside the pantry itself. A standard shoe organizer can hold 24–30 small jars, spice bottles, or snack packets, and installation takes 10 minutes, just hang it on the door with the provided hooks or screws. Check your door swing first: if the pantry opens inward and you’d hit the organizer with your elbow, position it lower or choose a shallower model.
For a sturdier, custom approach, build shallow shelves directly onto the inside of the pantry door using adjustable bracket arms and narrow boards (8–10 inches deep). This requires pilot holes and wood screws, but you’ll get exactly the depth and spacing you want. Weight is the trade-off: a door with shelves will swing heavier and may put stress on the hinge over time if overloaded. Keep items under 2–3 pounds per shelf and inspect hinges annually.
Corner Carousel Solutions
Deep pantry corners are notorious dead zones, items disappear into the back and get forgotten. A lazy Susan carousel (rotating corner shelf) is a simple, effective fix. These are available as single 2-tier units (roughly $40–80) or custom pull-out carousels ($200+). The single-unit versions require only a level, flat shelf surface and a few minutes to secure with non-slip liners or brackets.
Alternatively, install a pull-out wire basket system on a sliding rail. These retrofit into existing corner shelves and let you slide the whole basket forward to grab what’s in back. Installation involves screwing rails to the underside of the shelf and the back corner, a task needing only a drill and 15 minutes. This solution works especially well for canned goods, jars, and boxed items you use regularly.
Container and Labeling Strategies
Once your shelving is in place, containers and labels separate an organized pantry from a messy one. Uniformity matters here: mismatched containers look chaotic and waste space. Clear, stackable plastic bins in standard sizes (quart, gallon, and half-gallon) let you see contents without opening them and take up less room than original boxes.
For dry goods (flour, sugar, rice, pasta, cereal), airtight containers with snap lids are worth the investment. A basic set of four containers runs $15–30 and lasts years. They prevent staleness, take up less shelf space than bulky original packaging, and stack neatly. Label each container with a waterproof label maker or painter’s tape and a fine-point pen, include the contents and, if you’re thorough, the expiration date.
Resources like The Kitchn feature detailed kitchen organization guides that show labeling systems in action. A label maker (under $30) is a small investment that pays dividends: hand-written labels fade and look sloppy over time. Use a consistent format: ingredient name on the front, date opened on the side if relevant.
Grouping by category (baking, breakfast, snacks, canned goods) and keeping like items together makes restocking and cooking faster. If you share your kitchen with others, clear categories and labels prevent double-buying and kitchen frustration. The extra 10 minutes spent labeling saves hours of hunting down a jar of oregano.
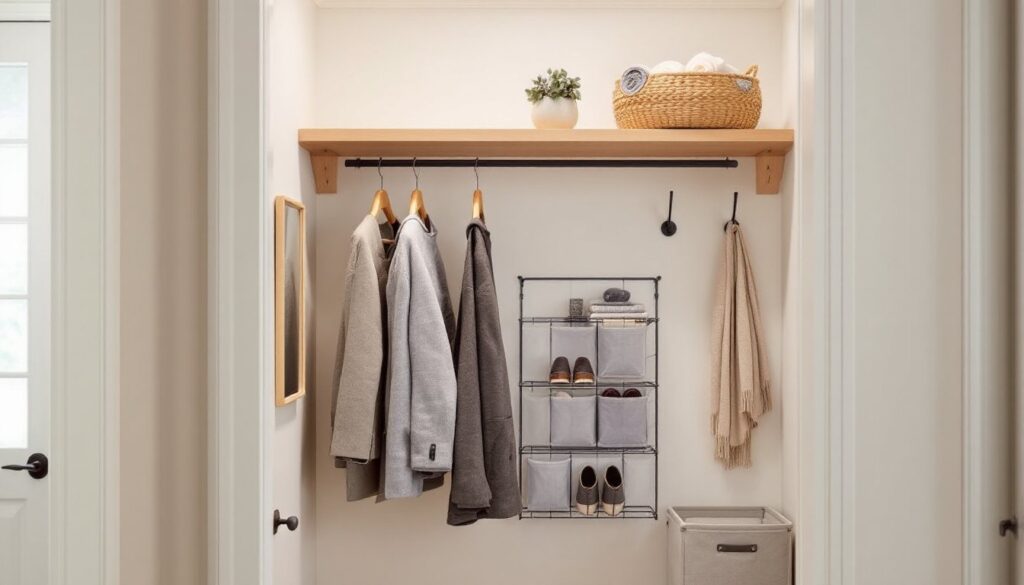
Rolling Carts and Sliding Drawers
If your pantry is a closet or alcove with no room to add shelves, rolling carts are a game-changer. A slim, three-tier utility cart (typically 15 inches wide, 24 inches tall, 10 inches deep) fits in tight spaces and rolls out when you need it. Metal construction is sturdier than plastic and lasts longer, though heavier. Expect to spend $40–100 depending on materials and wheel quality.
Stack containers, smaller bins, and frequently used items on each tier. The bottom tier is perfect for bulk items or heavier cans: upper tiers work well for snacks, spices, or baking supplies. Because it’s mobile, a cart lets you pull everything within arm’s reach while prepping, no reaching into deep shelves or crouching. The trade-off is that it takes up floor space when parked: measure your pantry width and door clearance before buying.
For built-in pantries with existing shelves, pull-out sliding drawers maximize accessibility. Install them on heavy-duty ball-bearing slides rated for 75+ pounds. These retrofit onto existing shelves in about an hour per drawer with basic tools (drill, level, measuring tape). Sliding drawers cost more upfront ($100–250 per drawer installed) but transform a standard shelf into something that feels custom and professional. Interior designers and resources like Martha Stewart often showcase pull-out systems as a premium organization feature, and rightfully so, given how much they improve usability.
Another low-cost alternative: install a narrow rolling step stool on lockable wheels inside the pantry. It tucks into a corner and lets you safely reach high shelves without climbing on an unsteady chair. Safety first: a fall from even 3 feet while reaching for a box of crackers is a real risk.
Conclusion
Small pantry spaces demand creativity, but they don’t demand expensive renovations. A combination of vertical shelving, smart door and corner use, consistent containers, and mobility solutions can transform any cramped pantry into an organized, functional space. Start with one or two projects, a shelf here, an organizer there, and build from there. Your future self, standing in a well-organized pantry knowing exactly where everything is, will thank you.